When it comes to learning how to curl your hair, there are multiple ways to go about it. I remember my first foray into hair-curling like it was yesterday. I was at my grandma’s house and she used plastic hair curlers throughout my hair. That’s how she curled her hair and of course I wanted to be just like her! The result was the cutest, curliest ringlets perfect for the 7-year-old I was.
As I grew older and technology became more advanced, I started using curling irons to get the curls I saw on celebrities like Julia Roberts and Sarah Jessica Parker. I grew up in the nineties, when curls were THE “it” hair do, and those ladies were absolutely killing it.
When the curling wand hit the scene, it instantly became a craze. People were a little bit confused and wondered whether it was really that much different than a curling iron, but once you try it, it’s hard not to become hooked!
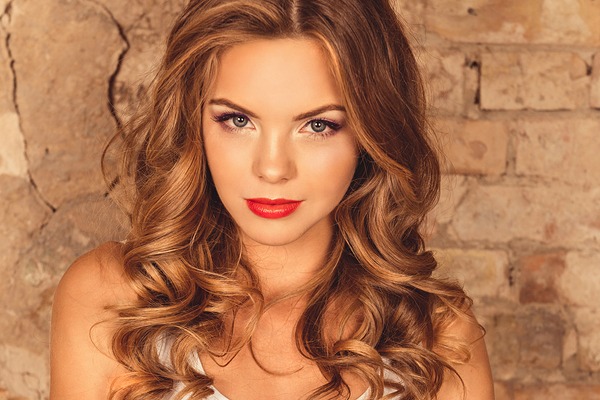
The curling wand was (and still is) praised for its ability to create everything from polished ringlets to piecey waves that have the perfect bend. It doesn’t just curl your hair, it gives you the ability to create the natural wavy look, which if you’re like me, is what you really want in a “curl” anyways.
The other great thing about using a curling wand as opposed to a curling iron? You don’t have to worry about unwanted creases that are almost inevitable because of the clasp on the iron. Whenever I use a curling iron, I usually find myself trying to straighten out the creases and re-curl them, and that’s just no good.
Curling your hair with a curling wand definitely takes some practice, but you’ll get used to how it feels, and once you get the hang of it, it will be your new best friend. It’s more flexible in terms of what you can do with your hair, and creates a more relaxed, natural texture.
The word on heat
When it comes to heating up the wand, make sure you don’t set the temperature too high because it can damage your hair, although some hair will require the wand to be hotter than others. Every wand will have a different heat setting, so I suggest you set it to whatever temperature you use with your other heat tools.
And since the curling wand requires you to use your fingers to wrap your hair around the tool, be careful not to burn your fingers! Just make sure to take extra caution, but it will become easier the more you use it. I’m currently crushing on the Hot Tools Flipperless Curling Wand as I find it’s the most versatile – you can vary the intensity of your curls by how much hair you use in each section, whether you pull the curl while it’s still hot, etc.
Alright, enough with all the rules, warnings, and recos. Follow the five simple steps below to becoming a curling wand master!
1) The Prep
Depending on your hair, prep for the curling wand will be different for everyone. For me, curling my hair usually works better on second day hair than freshly washed and dried, however, for others, it’s best to wash and dry right before using the wand.
Either way, make sure your hair is free of tangles and can be easily moved around and separated. At this point you can spritz some heat-resistant spray on your hair (I love TRESemme Thermal Creations Heat Tamer Protective Spray) if you wish to protect it from the heat of the wand.
2) Section off your hair
Sectioning your hair is a great way to ensure you’re curling all of your hair properly. There’s nothing worse than realizing you’ve missed a piece here and a piece there once you’re already out the door.
The best way to section your hair when using a curling wand (as mentioned, I love the Hot Tools Flipperless Curling Wand) is to take your hair from ear to ear and place the top section of your hair on the top of your head with a clip. This allows you to work with the very back, bottom section first.
This video by Confessions of a Hairstylist will give you a good look at how to section your hair properly.
Working section by section will make it easier for you to see where you’ve curled and where you haven’t.
3) Wrap it
Now comes the fun part!
Hold the curling wand so it’s facing downward (this is the most important part of this whole post!). Take your hair in one or two-inch sections and wrap it around the wand, without overlapping the hair.
If you want larger, looser waves, wrap larger sections of your hair, and if you want tighter curls, wrap smaller sections. If you want the beach wave look, only use the curling wand from the middle of your hair, and wrap it a few times, leaving an inch on the ends.
Hold each section around the wand for a few seconds and then release. You can also hold each curl in your hand as it cools to help it keep its shape!
You may want to put hairspray on each section before curling if your hair doesn’t curl easily.
4) On to the next
Once you’ve curled the first section of your hair, release some hair from the top of your head and repeat step three until you’ve finished all sections of your hair.
Make sure that you curl the front sections of your hair away from your face. This means in a clockwise direction on the right side of your face and a counter clockwise direction on the left side. This opens up your whole look!
5) Finishing touches
Run your fingers through your hair to loosen up the curls and make them look more au natural. Finish off with a douse of flexible yet strong-hold hairspray (my favourite is Dove STYLE+care Hairspray) and you’ve mastered the curls by curling wand look!
If you’re more of a visual learner, I absolutely love this tutorial by Sierra Dallas. She shows you step by step how to create the perfect curls with a curling wand!
Getting perfect curls with a curling wand will take practice, but once you’ve got the hang of it, you’ll have curls to die for! Follow these five simple steps and you’ll be rocking your dream head of curls in no time!


